If you own a mikrotik router and would like to access your home network from anywhere in the world, or while at work then you can follow this guide. 🙂
IMO, this is a much better option than having to use TeamViewer to access your PC remotely. You could setup a VPN server on your home network instead for free, and then access whatever PC you want to on your home network with Remote Desktop, VNC or whatever you want to use. You could even use this to access files on your network, or even access your printer at home from the internet, or whatever you want to. The important thing is that it will be as if your PC is on your home network when you’re not at home. 🙂
There are multiple different types of VPN connections you could create, like PPTP, SSTP, OpenVPN and L2TP.
I have found that PPTP is the most simple to setup, but apprently it isn’t secure.
An OpenVPN server is probably the hardest to setup out of all of them, and haven’t ever set it up on a mikrotik router before, but it is probly the most secure. So I thought I would use an L2TP VPN as its quite secure, and not that hard to setup.
This guide assumes that your router already has the basics setup (can access the internet, etc).
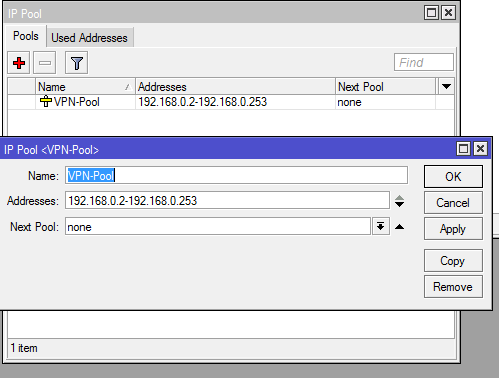
Step 1: First we need to create an IP Pool
This is what is going to determine what IP addresses get handed out to the clients connecting to your VPN server.
You can find this by clicking on IP on the left, then Pool.
Step 2: Now we need to create a profile
On the left click on PPP, then go to the “Profiles” tab.
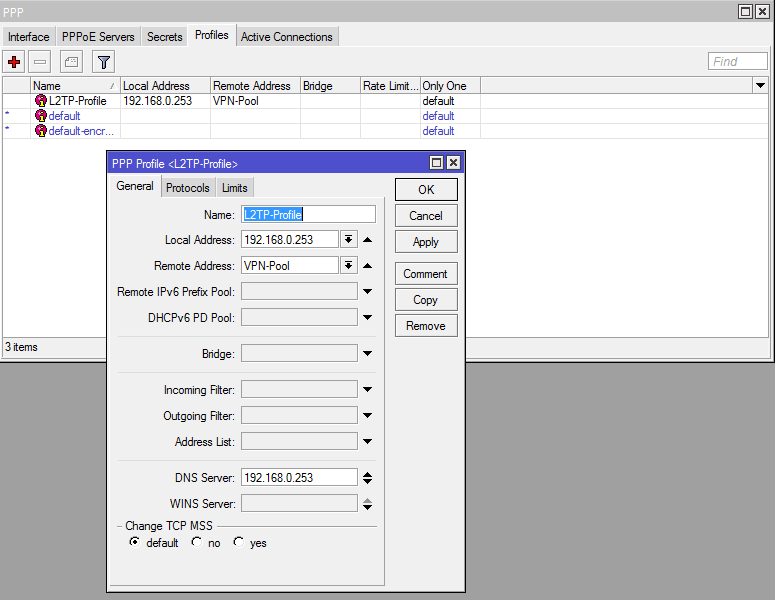
The local address is going to be the IP that the VPN clients can use to communicate with the router. (In the screenshot I used 192.168.0.253, but it should have been 192.168.0.254 instead since 253 is part of the IP Pool)
The remote address will be the IPs that get handed out to the VPN clients, over here you select the IP Pool that you created in step 1.
The DNS Server will be the dns server your VPN clients use, you can make it use your router’s DNS (192.196.0.254 in this case) or you can just set it to Google’s DNS or whatever DNS servers you want to use.
Step 3: We will now create a username and password
Now in the PPP window go to the “Secrets” tab.
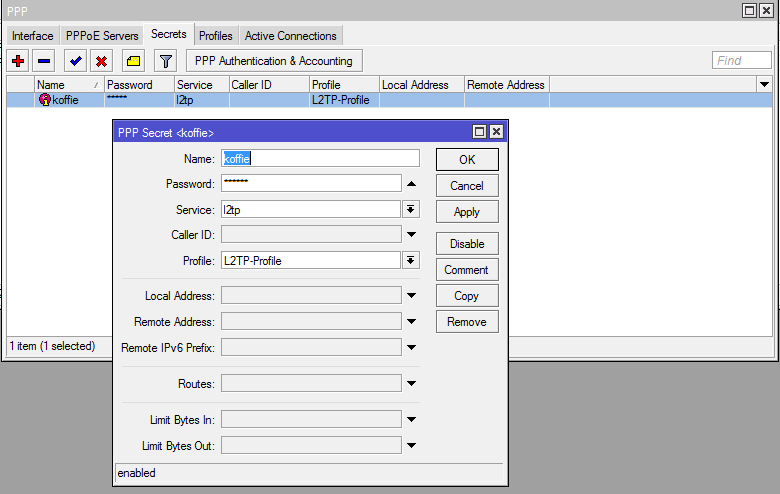
Name: This will be the username to log in to the VPN.
Password: The password to log in to the VPN.
Profile: Change this to the profile that you created in step 2.
Step 4: Setting up the L2TP Interface
In the PPP window changes to the “Interface” tab.
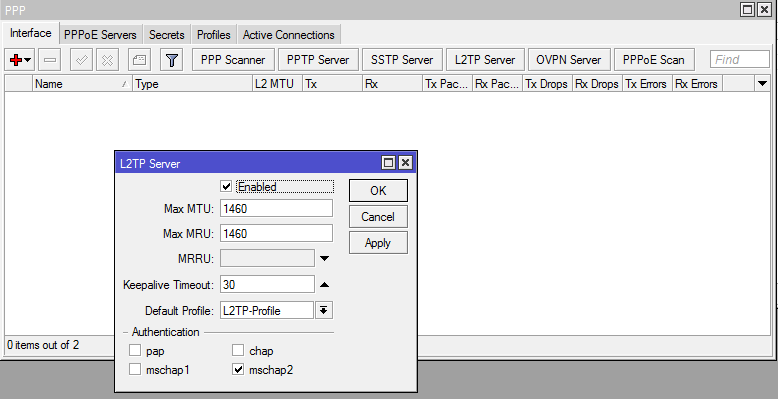
- Check the enabled block.
- Change the profile to the one you created in step 2.
- Untick all the authentication methods except mschap2.
- I have only ever used mschap2 authentication, never tried any of the others but mschap2 works just fine.
Step 5: Setting up the IPSec peer
On the left click on IP, then IPSec and change to the “Peers” tab.
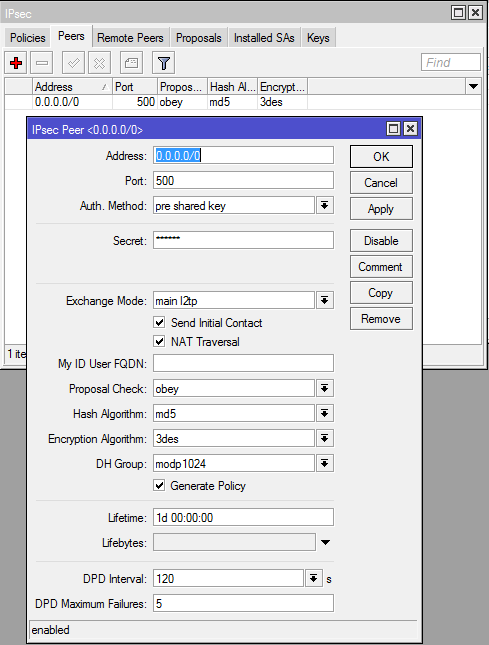
- Fill in the secret (this is a password you will share with all the VPN clients)
- Change the Exchange Mode to “main l2tp”
- Enable “Send Initial Contract” and “NAT Traversal”
- Enable “Generate Policy”
- Change the hash algorithm to “sha” it is better than md5.
Step 6: Change the default proposal
In the IPSec window change to the “Proposals” tab.
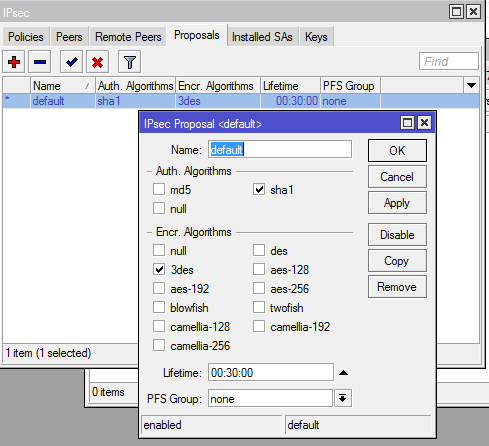
- Choose sha1 for Auth. Algorithms.
- Choose 3des for Encr. Algorithms.
- Set PFS Group to “none”
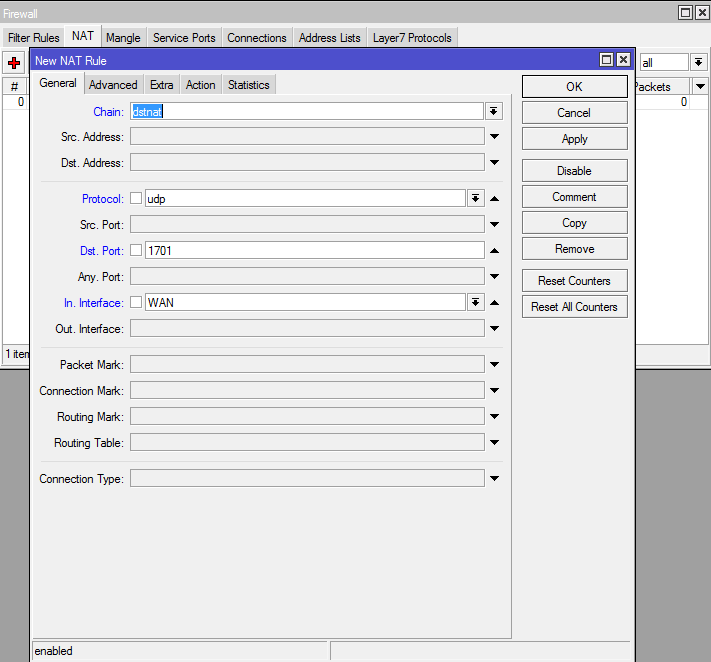
Step 7: Create a NAT rule
Im not sure if this step is really necessary or not, but I had to do this on my router before it would work.
On the left click IP, then select Firewall and go to the “NAT” tab.
Create a NAT rule that looks like my example below:
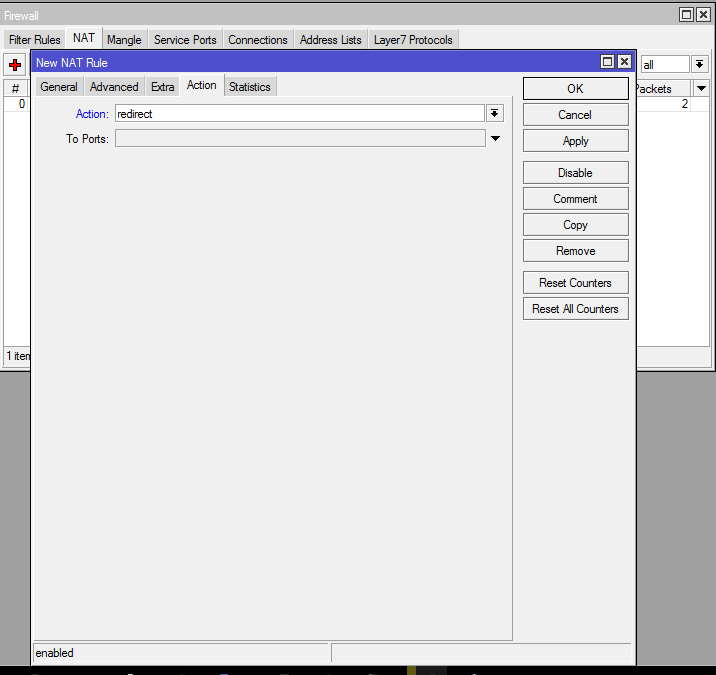
and under the “Action” tab set the action to “redirect” like my example below,:
Step 8: Set up the client (Windows 10)
Go to Start >> Settings >> Network & Internet >> VPN >> Add a VPN connection
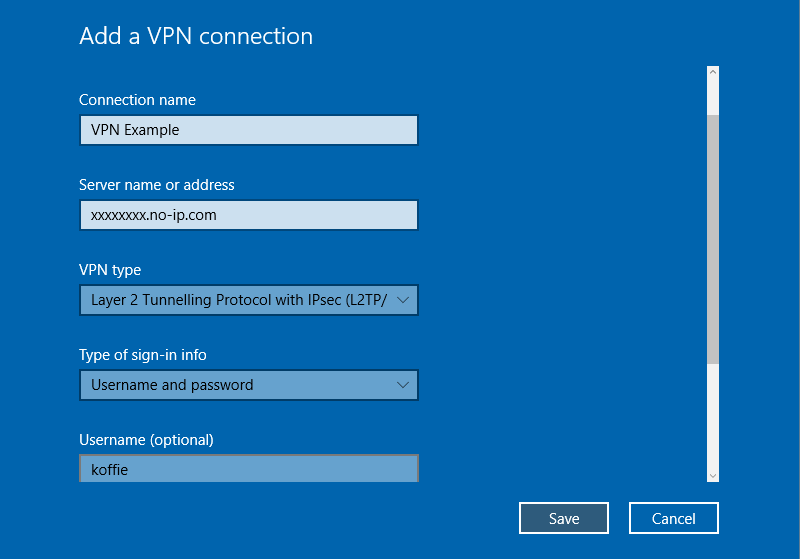
- VPN Provider: Windows (built-in)
- Connection name: Whatever you want.
- Server name or address: The IP of the WAN Interface (This is the external IP of your router, usually this will be your no-ip, dyndns, duckdns, etc)
- VPN type: Layer 2 Tunnelling Protocol with IPsec (L2TP/IPsec)
- Type of sign-in info: Username and password
- Username: The username you created in step 3.
- Password The password you created in step 3.
- Click Save.
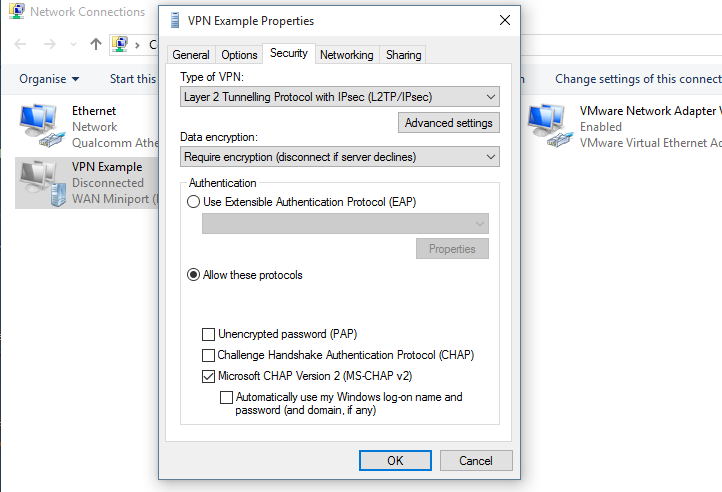
- Now click on “Change adapter options”
- Right click on your VPN connection, then click properties.
- Go to the Security Tab.
- Click on “Advanced settings”
- Check the “Use pre-shared key for authentication” radio button, then enter the shared key you made in step 5.
- Make sure your settings look like mine in the example below:
Thats it! You should be able to connect to your VPN server with this configuration.